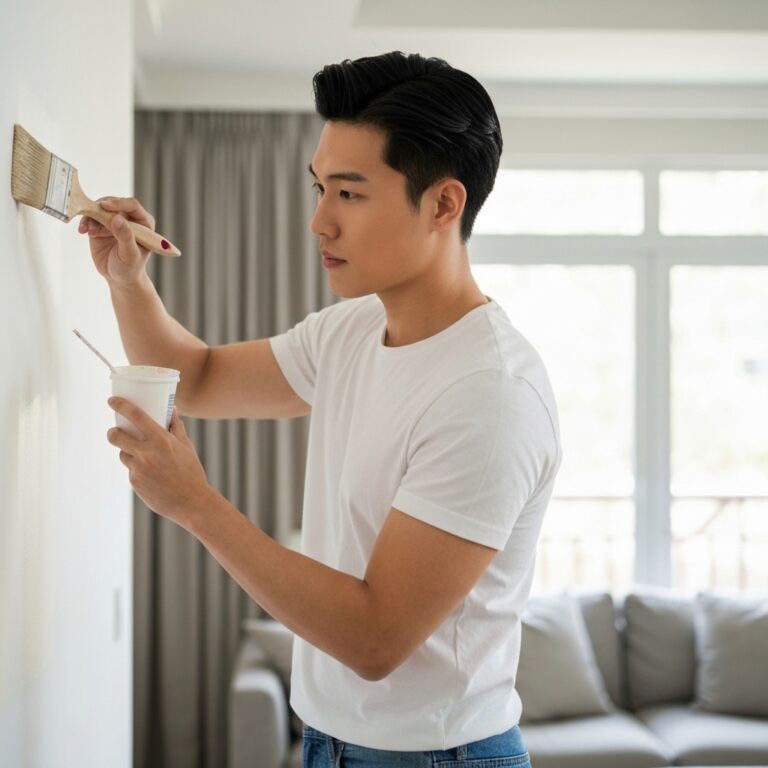
As a DIY enthusiast, I know the joy and satisfaction that comes from transforming a space with a fresh coat of paint. But let’s be real, painting can also be time-consuming and daunting. That’s why I’m here to share some painting hacks that will save you time and make the process a whole lot easier. From choosing the right paint colors to optimizing your painting technique, these tips will help you achieve professional-looking results without the hassle. Prep your surfaces properly, invest in high-quality brushes and rollers, and speed up drying time with clever tricks. With these time-saving hacks, you’ll be able to tackle any painting project with confidence and efficiency.

Choose the Right Paint Colors
One important step in painting is choosing the right paint colors. When it comes to selecting paint finishes, it’s essential to consider the overall aesthetic you want to achieve. Different finishes, such as matte, satin, or glossy, can dramatically impact the final look of your project. Additionally, color psychology plays a significant role in creating the desired atmosphere in a room. Warm colors like red or yellow can evoke feelings of energy and warmth, while cool colors like blue or green can promote a sense of calmness and tranquility. Understanding how different colors can affect mood and emotions can help you make informed choices when selecting paint colors for your space. By considering both paint finishes and color psychology, you can ensure that your paint choices enhance the overall ambiance of your home.
Prep Your Surfaces Properly
When it comes to painting, proper surface preparation is key. Cleaning your surfaces thoroughly before painting ensures that the paint adheres properly and lasts longer. Additionally, choosing the right primer for your specific surface type is important to achieve a smooth and even finish. Lastly, don’t forget to sand your surfaces to create a smooth base for the paint to adhere to.
Cleaning Is Crucial
To properly prepare surfaces for painting, it is crucial to clean them thoroughly. One of the first things to consider is the importance of proper ventilation. When cleaning surfaces, it’s essential to ensure that there is enough fresh air circulating in the area. This will not only help to eliminate any fumes or odors from the cleaning products but also ensure that the paint adheres properly to the surface. Additionally, using the right cleaning tools and equipment is vital for achieving a clean and smooth surface. Items such as scrub brushes, sponges, and cleaning solutions specifically designed for the type of surface being painted can make the cleaning process more efficient and effective. By taking the time to clean the surfaces properly, you’ll create a solid foundation for your paint job and achieve professional-looking results.
Choose the Right Primer
I always make sure to choose the right primer to properly prepare my surfaces for painting. Choosing the right primer is crucial because it helps to create a smooth and even surface, allowing the paint to adhere better and last longer. There are different types of primers available, such as oil-based, water-based, and shellac-based, each serving a specific purpose. Oil-based primers are great for blocking stains, water-based primers are ideal for most surfaces, and shellac-based primers work well on wood and metal.
When using primer, it’s important to avoid common mistakes. One common mistake is applying too many coats of primer, which can lead to a thick and uneven paint finish. Another mistake is not allowing the primer to dry completely before applying the paint, which can cause the paint to peel or not adhere properly. It’s also important to properly clean and prepare the surface before applying the primer to ensure optimal adhesion. By choosing the right primer and avoiding these common mistakes, I can ensure a professional and long-lasting paint job.
Sand for Smoothness
To achieve a smooth surface for painting, I always sand the surfaces properly. Choosing the right grit is essential for achieving the desired smoothness. When sanding, I start with a coarse grit sandpaper to remove any rough patches or imperfections on the surface. This helps create an even and smooth base for the paint. After that, I switch to a finer grit sandpaper to further refine the surface and ensure a flawless finish. It’s important to use the appropriate sanding techniques, such as sanding in a circular motion or following the grain of the wood, depending on the type of surface. By taking the time to sand properly, I can ensure that the paint adheres well and the final result is smooth and professional-looking.
Use Painter’s Tape for Clean Lines
One can achieve clean lines while painting by utilizing painter’s tape. This handy tool is especially useful in avoiding paint drips and achieving perfect edges. When I tackle a painting project, I always make sure to apply painter’s tape along the edges that I want to keep clean and crisp. By doing so, I create a barrier that prevents the paint from bleeding onto unwanted areas. It provides a clean boundary for the paint, resulting in sharp lines and a professional finish. Additionally, painter’s tape is easily removable without leaving any residue or damage, making clean-up a breeze. With the help of painter’s tape, I can confidently paint with precision and achieve flawless results.
Invest in High-Quality Brushes and Rollers
When it comes to painting, choosing the right tools can make a significant difference in the outcome. Investing in high-quality brushes and rollers can save time and effort in the long run. Not only do they provide smoother and more even coverage, but they are also more durable, making them a cost-effective choice for DIY enthusiasts.
Brush Vs. Roller
I highly recommend investing in high-quality brushes and rollers for painting, as they make a significant difference in the final result. When it comes to choosing between a brush and a roller, there are pros and cons to consider for each. A roller is great for covering large areas quickly and efficiently. It can provide a smooth and even finish, especially when using a high-quality roller sleeve. On the other hand, a brush allows for more precision and control, making it ideal for cutting in and painting detailed areas. A high-quality brush with fine bristles will help to achieve a professional-looking finish. Ultimately, the choice between a brush and a roller depends on the specific project and personal preference. Investing in good quality tools will ensure that you achieve the best possible outcome.
Benefits of High-Quality
To achieve professional-looking results, it is essential to invest in high-quality brushes and rollers. When it comes to painting, the benefits of durability and the advantages of professional-grade tools cannot be overstated. High-quality brushes and rollers are designed to withstand the rigors of multiple painting projects, ensuring that they last longer and maintain their performance over time. These brushes and rollers are made from superior materials that are more resistant to wear and tear, allowing for a smoother and more efficient painting experience. Additionally, professional-grade tools offer better control and precision, resulting in a flawless finish. Investing in high-quality brushes and rollers may initially cost more, but the long-term benefits of durability and professional-grade performance make it a worthwhile investment for any DIY enthusiast.
Cost-Effective Long-Term Investment
Investing in high-quality brushes and rollers proves to be a cost-effective long-term choice for DIY enthusiasts. When it comes to painting, using cheap brushes and rollers may seem like a cost-saving tip in the short term. However, they often result in a poor finish and require more touch-ups, leading to additional costs in the long run. High-quality brushes and rollers, on the other hand, are designed to withstand repeated use and provide smooth, even coverage. They hold more paint and distribute it evenly, allowing for faster and more efficient painting. Additionally, their durable bristles and sturdy construction ensure that they last longer, saving you money on replacements. So, if you’re looking for cost-effective DIY painting hacks, investing in high-quality brushes and rollers is a smart choice.
Optimize Your Painting Technique
By refining my painting technique, I was able to achieve a more efficient and professional finish. To improve efficiency and minimize mistakes, I started by properly preparing the surface before painting. This involved cleaning, sanding, and priming the walls to ensure smooth and even coverage. Next, I invested in high-quality brushes and rollers, which helped me to apply paint more smoothly and evenly. I also learned the importance of using the right amount of paint and applying it in thin, even coats to prevent drips and streaks. Additionally, I discovered the benefits of using painter’s tape to create crisp, clean lines and protect surfaces from accidental paint splatters. These small adjustments to my technique made a significant difference in the quality and speed of my painting projects.
Speed Up Drying Time
I found a simple way to speed up drying time by using a fan or opening windows for increased air circulation. This method is especially helpful when you need to finish a project quickly or when you want to reduce brush strokes on your painted surface. By allowing more air to circulate around the wet paint, it helps to evaporate the moisture faster, resulting in a quicker drying time. Moreover, this technique is also beneficial for quick touch-ups. Instead of waiting for the paint to dry naturally, you can use a fan or open windows to speed up the drying process, allowing you to make necessary touch-ups sooner. So, next time you’re in a hurry or need to reduce brush strokes, try using a fan or opening windows for faster drying time.
Clean Up Made Easy
To simplify the clean-up process, I rely on a few essential tools and techniques. After using quick drying techniques to speed up the drying time of my paint, I turn my attention to cleaning up. One of the best tools I use is a drop cloth or plastic sheeting to protect my floors and furniture from any potential spills or drips. This not only makes the clean-up easier but also saves me from having to scrub stains off my surfaces later on. Additionally, I opt for eco-friendly cleaning solutions to ensure that I am not exposing myself or the environment to harmful chemicals. Using a mixture of warm water and mild detergent, I am able to effectively remove any paint splatters or residue from my brushes and rollers. With these tools and techniques, cleaning up after a painting project becomes a breeze.
Store and Preserve Your Paint Supplies
For optimal organization and longevity of your paint supplies, consider proper storage and preservation methods. Proper storage is essential to ensure that your paint supplies remain in good condition and are ready for use whenever you need them. One important aspect of proper storage is keeping your paint cans tightly sealed to prevent air from entering and drying out the paint. This will help extend the shelf life of your paint and ensure that it is still usable when you need it. Additionally, it is important to store your brushes properly by cleaning them thoroughly after each use and storing them in a dry and dust-free area. By following these simple storage and preservation methods, you can ensure that your paint supplies last longer and are always ready for your next DIY project.
Conclusion
So why spend hours on a painting project when you can save time with these simple hacks? By choosing the right paint colors, prepping surfaces properly, and using painter’s tape, you can achieve clean and professional results. Investing in high-quality brushes and rollers, optimizing your painting technique, and speeding up drying time will further streamline the process. And don’t forget to make clean up easy and store your paint supplies properly. Ready to transform your space with ease?